
Table of Contents
Ultimate EV Charger Maintenance Checklist: Preventive Care & Safety Guide
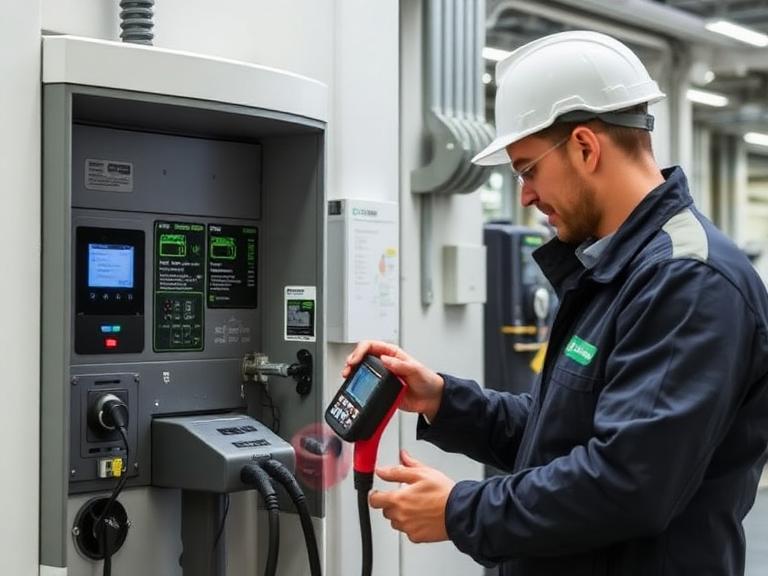
Electric Vehicle Supply Equipment (EVSE) represents a sophisticated intersection of high-voltage electrical distribution, complex power conversion electronics, physical mechanical housing, and cloud-connected software networks. Whether managing a single residential wallbox or operating a multi-megawatt commercial charging plaza along busy transit corridors, maintaining high reliability, safe operation, and optimal performance demands a structured preventive maintenance strategy.
Unscheduled charger downtime disrupts fleet operations, creates lost revenue for Charge Point Operators (CPOs), and generates friction for drivers. Implementing an actionable EV charger maintenance checklist allows station operators, electrical contractors, and site host facility managers to identify physical degradation, electrical imbalance, and software anomalies long before they cause system breakdowns or safety hazards.
1. Executive Summary: Why Preventive Maintenance Matters
EV chargers operate under demanding conditions, including daily handling by untrained users, continuous exposure to ambient weather extremes, high thermal cycles, and high electrical current flows. Neglecting routine upkeep introduces operational risks, safety issues, and financial losses.
                     ┌───────────────────────────────────────────────┐
                     │   Core Pillar Benefits of EVSE Maintenance   │
                     └───────────────────────┬───────────────────────┘
                                             │
      ┌──────────────────────┬───────────────┴───────────────┬──────────────────────┐
      │                      │                               │                      │
┌─────┴──────────────┐ ┌─────┴──────────────┐ ┌──────────────┴──────┐ ┌──────────────┴──────┐
│ Operational Uptime │ │  Safety & Risk     │ │ Financial Performance│ │ Asset Lifespan     │
│ & Network SLA      │ │  Mitigation        │ │ & Metering Accuracy  │ │ Extension          │
└────────────────────┘ └────────────────────┘ └──────────────────────┘ └────────────────────┘
- Operational Uptime & SLA Compliance: Public charging networks must maintain uptime above 97–99% to qualify for government incentives and customer retention targets. Routine checks reduce component failure rates.
- Safety & Hazard Mitigation: Physical wear, loose electrical terminations, or damaged cable insulation can cause electrical arc faults, short circuits, equipment fires, or electric shock risks.
- Financial Performance: Loose connections, dirty contact pins, and uncalibrated power meters create energy loss, inaccurate billing, and revenue leakage.
- Asset Lifespan Extension: Timely filter replacements, seal inspections, and anti-corrosion treatments extend equipment lifespans from 5 years to more than a decade.
2. Maintenance Categorization by Frequency
A successful maintenance strategy divides tasks into distinct operational frequencies: Daily/Weekly Operational Checks, Monthly/Quarterly Preventive Maintenance, and Annual Comprehensive Servicing.
Maintenance Frequency Matrix
| Maintenance Tier | Performed By | Scope & Objectives | Key Tools Required |
| Weekly / Routine | Site Host Staff / Field Staff | Visual integrity, cleanliness, cable placement, screen & UI checks. | Microfiber cloths, contact cleaner, inspection log. |
| Quarterly PM | EVSE Maintenance Technicians | Cable wear checks, filter cleaning, internal dust removal, software updates. | Torque wrenches, compressed air, multimeters, firmware tools. |
| Annual Comprehensive | Certified Electricians / High-Voltage Engineers | Insulation testing, thermal imaging, RCD testing, terminal retorquing, full safety validation. | Thermal imaging cameras, insulation testers, EVSE simulators. |
3. The Ultimate EV Charger Maintenance Checklist
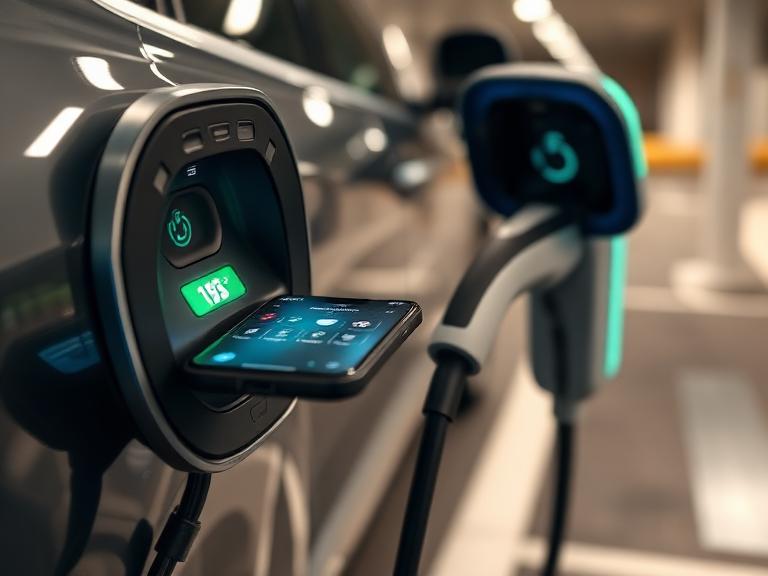
Below is the definitive, step-by-step master checklist categorized across five critical functional domains.
Phase 1: Physical, Housing & Environmental Inspection (De-Energized)
Before performing internal work, isolate the power at the main distribution breaker and verify zero voltage.
┌──────┬─────────────────────────────────────────────────┬────────┬────────────────────────────────────────────────────────┐
│ ID   │ Task Item                                       │ Status │ Pass Criteria / Action Items                           │
├──────┼─────────────────────────────────────────────────┼────────┼────────────────────────────────────────────────────────┤
│ P1.1 │ Enclosure Outer Shell Inspection                │ [  ]   │ Enclosure free from structural dents, cracks, rust. │
│ P1.2 │ Mounting Integrity & Foundation Check           │ [  ]   │ Anchor bolts secure; wall mount/plinth remains rigid.   │
│ P1.3 │ Weather Seals & Gasket Verification             │ [  ]   │ Rubber door seals intact, supple, free of tears.    │
│ P1.4 │ Physical Protection & Crash Barriers            │ [  ]   │ Bollards undamaged; clear physical space around unit. │
│ P1.5 │ Screen, Glass & UI Panel Cleanliness            │ [  ]   │ Touchscreen clean, fully legible, vandal-free.         │
│ P1.6 │ Drainage & Environmental Ingress Check          │ [  ]   │ No standing water, mold, or pest/insect infestation. │
└──────┴─────────────────────────────────────────────────┴────────┴────────────────────────────────────────────────────────┘
Phase 2: Cable, Connector & Mechanical Assemblies Check
Cables and charging guns undergo the highest mechanical stress and wear.
┌──────┬─────────────────────────────────────────────────┬────────┬────────────────────────────────────────────────────────┐
│ ID   │ Task Item                                       │ Status │ Pass Criteria / Action Items                           │
├──────┼─────────────────────────────────────────────────┼────────┼────────────────────────────────────────────────────────┤
│ P2.1 │ Cable Outer Jacket Outer Sheath Inspection      │ [  ]   │ No exposed wiring, deep abrasions, or kinking.   │
│ P2.2 │ Connector Pin & Housing Cleanliness             │ [  ]   │ Pins clean, free of burn/arc marks, dust, moisture.  │
│ P2.3 │ Retractor & Cable Management Functionality      │ [  ]   │ Cable retracts fully without binding or ground drag.   │
│ P2.4 │ Mechanical Latching Mechanism Check             │ [  ]   │ Latch locks securely into vehicle inlet socket.      │
│ P2.5 │ Liquid-Cooling Hose Integrity (DC Fast Chargers)│ [  ]   │ No coolant leaks, drops, or outer sleeve deterioration. │
│ P2.6 │ Emergency E-Stop Button Mechanical Action      │ [  ]   │ Button depresses cleanly and latches into stop state.  │
└──────┴─────────────────────────────────────────────────┴────────┴────────────────────────────────────────────────────────┘
Phase 3: Internal Electrical & Power Electronics Inspection
Warning: Internal checks must be conducted by qualified technicians adhering to safety and Lockout/Tagout (LOTO) procedures.
┌──────┬─────────────────────────────────────────────────┬────────┬────────────────────────────────────────────────────────┐
│ ID   │ Task Item                                       │ Status │ Pass Criteria / Action Items                           │
├──────┼─────────────────────────────────────────────────┼────────┼────────────────────────────────────────────────────────┤
│ P3.1 │ Terminal Screw & Busbar Retorquing              │ [  ]   │ All power terminations tightened to OEM spec.       │
│ P3.2 │ Thermal Degradation & Discoloration Check       │ [  ]   │ Wiring insulation shows no signs of heat damage.    │
│ P3.3 │ Air Filter Cleaning / Replacement               │ [  ]   │ Intake/exhaust filters cleaned or replaced.            │
│ P3.4 │ Cooling Fan & Blower Operational Check          │ [  ]   │ Fans spin freely without bearing noise or obstruction. │
│ P3.5 │ Contactor & Relay Point Inspection              │ [  ]   │ Contactor faces clean without severe pitting/welding.  │
│ P3.6 │ Surge Protection Device (SPD) Status Check      │ [  ]   │ SPD window indicates normal (Green); no tripped flags. │
└──────┴─────────────────────────────────────────────────┴────────┴────────────────────────────────────────────────────────┘
Phase 4: Functional, Operational & Live Electrical Testing (Power ON)
Once housing and internal components pass inspection, re-energize the system to verify function.
┌──────┬─────────────────────────────────────────────────┬────────┬────────────────────────────────────────────────────────┐
│ ID   │ Task Item                                       │ Status │ Pass Criteria / Action Items                           │
├──────┼─────────────────────────────────────────────────┼────────┼────────────────────────────────────────────────────────┤
│ P4.1 │ RCD / RCCB Trip Testing                         │ [  ]   │ Residual current device trips within safety limits.   │
│ P4.2 │ Protective Earth (PE) Resistance Testing        │ [  ]   │ Loop impedance values meet safety regulations.     │
│ P4.3 │ Insulation Resistance Test                      │ [  ]   │ High insulation resistance between phase & earth.     │
│ P4.4 │ Simulated Vehicle Handshake & Charging Cycle    │ [  ]   │ Simulator initiates State A -> B -> C seamlessly.    │
│ P4.5 │ Emergency Stop Electric Interlock Trigger       │ [  ]   │ E-stop triggers instant power de-energization.        │
│ P4.6 │ RFID Reader & User Payment Gateway Verification │ [  ]   │ Tap-to-charge and app initiation process transactions. │
└──────┴─────────────────────────────────────────────────┴────────┴────────────────────────────────────────────────────────┘
Phase 5: Software, Connectivity & Cyber-Security Maintenance
Physical reliability must be paired with cloud connectivity and secure firmware.
┌──────┬─────────────────────────────────────────────────┬────────┬────────────────────────────────────────────────────────┐
│ ID   │ Task Item                                       │ Status │ Pass Criteria / Action Items                           │
├──────┼─────────────────────────────────────────────────┼────────┼────────────────────────────────────────────────────────┤
│ P5.1 │ Firmware & OS Version Update                    │ [  ]   │ Updated to latest stable OEM release.                 │
│ P5.2 │ OCPP Communication Protocol Heartbeat Test      │ [  ]   │ Continuous message delivery to CPMS server.            │
│ P5.3 │ Cellular / Wi-Fi / Ethernet Signal Audit        │ [  ]   │ Signal strength adequate; antennas firmly attached.   │
│ P5.4 │ Mid-Compliant Metering & Billing Calibration    │ [  ]   │ kWh output readings match platform telemetry.         │
│ P5.5 │ Error Log Clean-up & Remote Diagnostics         │ [  ]   │ Clear historical non-critical fault flags.          │
└──────┴─────────────────────────────────────────────────┴────────┴────────────────────────────────────────────────────────┘
4. Specialized Maintenance Requirements for DC Fast Chargers
High-Power DC Fast Chargers (60 kW to 480 kW) require additional specialized maintenance beyond standard Level 2 AC chargers:
                               ┌─────────────────────────────────────────┐
                               │     DC Fast Charger Specialized PM      │
                               └────────────────────┬────────────────────┘
                                                    │
         ┌──────────────────────────────────────────┼──────────────────────────────────────────┐
         │                                          │                                          │
┌────────┴─────────────────────────┐      ┌─────────┴────────────────────────┐      ┌──────────┴────────────────────────┐
│ Liquid-Cooling System Maintenance│      │ Airflow & Filtration Management  │      │ Power Module Load Balancing       │
├──────────────────────────────────┤      ├──────────────────────────────────┤      ├──────────────────────────────────┤
│ • Monitor coolant levels & pH    │      │ • Clean intake fan louvers       │      │ • Test power conversion modules  │
│ • Inspect circulation pumps      │      │ • Replace HEPA dust filters      │      │ • Calibrate internal DC contactor│
│ • Check hoses for micro-fissures │      │ • Clear heat-sink thermal buildup│      │ • Verify dynamic power sharing   │
└──────────────────────────────────┘      └──────────────────────────────────┘      └──────────────────────────────────┘
- Liquid-Cooling System Servicing: High-amp chargers (300A+) circulate dielectric cooling fluid through the cable and connector. Technicians must check coolant reservoir levels, verify pump pressure, replace aging fluid according to OEM intervals, and check for micro-leaks.
- Forced-Air Filtration Systems: High-power rectifiers generate significant heat. Air filters must be cleaned or replaced quarterly to prevent thermal throttling and shutdown during high ambient temperatures.
- Power Module Diagnostics: Modular DC fast chargers use interconnected power conversion units. Technicians must monitor individual module performance, rebalance phase loads, and replace degraded modules to maintain full output.
5. Step-by-Step Maintenance Workflow Execution
1.Safety Isolation & Site Preparation:Apply Lockout/Tagout (LOTO) protocols at the upstream breaker panel.
Secure the service area with safety cones. Open the upstream circuit breaker or isolator switch, apply LOTO padlocks, and test with a calibrated multimeter to confirm zero energy across all phases and earth.
2.Visual & Mechanical Exterior Survey:Examine exterior housing, cable assembly, and mounting stability.
Inspect the outer shell, screen glass, cable jackets, connector pins, and mounting fasteners. Document any physical damage, rust, or missing warning labels.
3.Internal Electrical & Thermal Inspection:Open cabinet door to clean, retorque, and inspect electrical components.
Open the enclosure to vacuum out dust and foreign particles. Use a calibrated torque wrench to verify tight electrical terminations on contactors, terminal blocks, and breaker connections. Check for thermal discoloration.
4.Live Electrical & Safety System Testing:Re-energize the unit and execute automated safety sequence tests.
Remove LOTO devices and restore main power. Connect an EVSE testing adapter to perform RCD trip testing, earth loop impedance checks, and emergency stop interlock verification.
5.Software Maintenance & Diagnostic Sign-Off:Update firmware, run diagnostic scans, and upload digital logs.
Connect to the charger via local service port or cloud portal. Flash pending firmware updates, clear minor fault histories, run an active test charging session, and upload the signed checklist to your maintenance management platform.
6. Frequently Asked Questions (15 FAQs)
FAQ 1: Why is a preventive maintenance checklist essential for EV chargers?
Answer: A preventive checklist helps technicians systematically identify physical wear, loose high-voltage connections, thermal damage, and software bugs before they lead to unexpected charger downtime, safety hazards, or expensive equipment replacement.
FAQ 2: How often should an EV charger be inspected?
Answer: Daily to weekly visual checks are ideal for high-traffic commercial stations. Comprehensive preventive maintenance (cleaning, terminal retorquing, software updates) should be completed quarterly, while full electrical safety testing must occur annually.
FAQ 3: What are the primary failure points on public EV chargers?
Answer: The most common failure points are damaged charging cables and connector pins from improper handling, overheating internal contactors, clogged cooling filters, and unstable software or cellular connectivity.
FAQ 4: Can property owners perform EV charger maintenance themselves?
Answer: Property owners can handle basic tasks like cleaning external enclosures, inspecting cables for visible wear, and keeping the surrounding area tidy. Any work inside the cabinet or involving high-voltage wiring requires certified electrical professionals.
FAQ 5: What safety procedures must be followed before opening a charger enclosure?
Answer: Technicians must disconnect upstream electrical power, lock and tag the isolating breaker (LOTO), use a multimeter to verify zero voltage across all terminals, and wear certified Personal Protective Equipment (PPE).
FAQ 6: How do you safely clean EV charger connectors and pins?
Answer: Isolate power first. Clear out dry dust using low-pressure compressed air, then clean contact pins using micro-swabs dampened with non-conductive, quick-evaporating electrical contact cleaner. Never use water jets or conductive metal scrapers.
FAQ 7: How does hot and humid weather affect EV charger maintenance needs?
Answer: Extreme heat increases thermal stress on power electronics, requiring frequent air filter cleaning and cooling fan checks. Moisture and high humidity increase the risk of internal condensation, making weather seal and gasket checks critical.
FAQ 8: What electrical tests are required during an annual EVSE audit?
Answer: Certified technicians must test protective earth (PE) continuity, insulation resistance, earth loop impedance, residual current device (RCD) trip timing, and emergency stop interlock response times.
FAQ 9: Why do electrical terminations inside an EV charger need periodic retorquing?
Answer: Daily heating and cooling cycles during charging cause conductors and copper busbars to expand and contract. Over time, this thermal cycling can loosen screw terminals, creating high-resistance hot spots that risk arc faults or component fires.
FAQ 10: What software maintenance is required for commercial EV charging networks?
Answer: Software tasks include updating firmware, checking cellular/Ethernet signal strength, testing OCPP messaging heartbeats, renewing SSL security certificates, and verifying power meter calibration.
FAQ 11: How do you maintain liquid-cooled cables on high-power DC fast chargers?
Answer: Maintenance includes inspecting coolant reservoirs, checking circulation pump operation, inspecting cable sleeves for fluid leaks, and replacing the cooling fluid according to OEM intervals.
FAQ 12: What documentation should be kept for EV charger maintenance compliance?
Answer: Station operators should maintain a digital log of completed inspection checklists, certified electrical test reports, firmware update history, component replacement records, and LOTO safety logs for compliance audits.
FAQ 13: How does preventive maintenance impact charger warranty coverage?
Answer: Most major EVSE manufacturers require proof of regular preventive maintenance by certified technicians to honor warranty claims. Neglecting routine upkeep like filter replacements or seal checks can void manufacturer warranties.
FAQ 14: What is the average maintenance cost for commercial EV chargers?
Answer: Routine preventive maintenance generally averages ₹15,000 to ₹30,000 ($200–$400 USD equivalent) annually per Level 2 charger, and ₹45,000 to ₹1,200,000 ($600–$1,500 USD equivalent) annually for high-capacity DC fast chargers.
FAQ 15: How can remote diagnostics reduce on-site maintenance visits?
Answer: Open Charge Point Protocol (OCPP) platforms allow CPOs to view real-time telemetry, clear soft fault codes, restart frozen units, and push over-the-air (OTA) firmware updates remotely, reserving on-site technician dispatches for hardware repairs.
7. Operational Best Practices & Conclusion
A structured EV charger maintenance checklist turns reactive repairs into predictable preventive maintenance. By combining frequent visual checks by site staff with certified technical inspections, CPOs and facility managers can safeguard high-voltage infrastructure, protect user safety, and maintain high network uptime.
- Digitize Your Inspections: Transition from paper forms to digital field service applications to capture geotagged photos, component serial numbers, and real-time maintenance logs.
- Stock Critical Spare Parts: Keep high-wear components—such as spare charging cables, replacement connector guns, air filters, and surge protection modules—in stock locally to minimize repair turnaround times.
- Train On-Site Operations Staff: Ensure site hosts and facility staff are trained to perform daily visual surveys, stow unhooked cables safely, and clean external touchscreens properly.